Real fiber prints
After all the obstacles we were able to finally print some real geometric pieces with fibers!
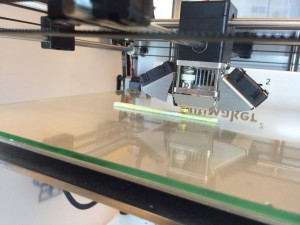
The Ultimaker busy printing a fiber-reinforced piece.
The pieces we printed were a big step and although they weren’t perfect, it was the prove a big step in the right direction.
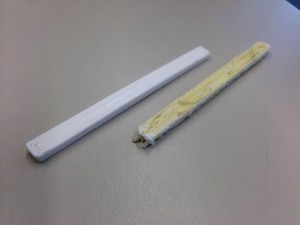
At the left there is a piece without fibers and at the right side the same piece was made using kevlar-fibers.
The kevlar-fibers don’t stick easily at the corner, and get pulled away. We’ve tried to prevent this from happening by pressing the fibers with a ruler to the base during the print.
[vimeo]https://vimeo.com/188796988[/vimeo]
Ratio calculating script
As previous mentioned, the ratio between fibers and filament has a crucial part in the system. Our previous approach had some variables which couldn’t be control totally. We wanted to find a way which calculated the exact ratio for each print. A python program scans through all the lines of the g-code and find the total length of all the printed parts and the total length that is extruded. The ratio between these two can be used to find the perfect settings. The total length can be seen as the required fiber length (the number of mm E2 has to extrude) and the total length that is extruded (the number of mm E1 has to extrude). After testing and measuring the amount extruded by E1 it turned out to be approximately 1130 mm instead of the 1297 mm that was given in the g-code file. A second test turned out to be 1160 mm instead of the calculated 1297 mm. The error is due to a discontinuity between the steps that are send to the stepper-motor of the filament and to mm it extrudes. This in’t a problem because our fiber also has a thickness.
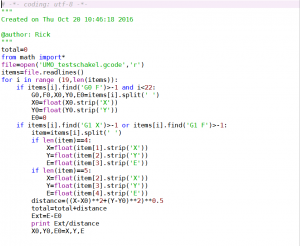
Python script which calculates the total path length
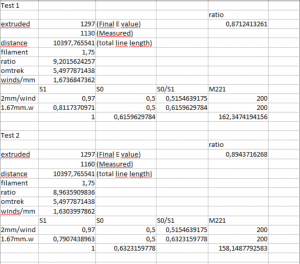
Excel file with the measurements and calculations. This way the ratio is calculated.
DIY Nozzle
Because we used a nozzle of 1.2 mm, we decreased the pressure inside the nozzle. This pressure is needed to make sure the fiber is well embedded into the print. To build up the pressure, we had to make our own nozzles in which the narrow part is longer.
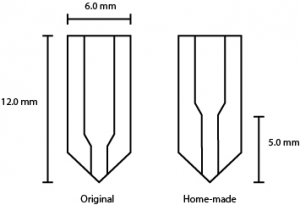
The difference between the original nozzle and the one we have made is shown in this picture.
We made two nozzles, with each different diameters of the extrusion parts. One has a diameter of 0.8 mm and the other has a diameter of 1.2 mm. The rest of the nozzle is exactly the same.
The length of the narrow part was first 10.0 mm. This concluded in a too high pressure, since the filament was pushed outside of the nozzle at the upper part. We decreased the length with steps of 2.5 mm, until the leaking stopped. We came to a length of 5.0mm.
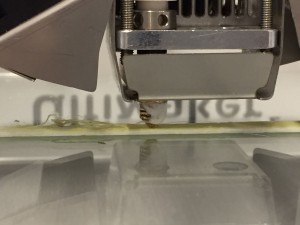
Too high pressure in the nozzle results into leakage.
The nozzle with a diameter of 0.8mm often jammed, which the 1.2mm nozzle did not do. Therefore, we decided to carry on with the 1.2 mm nozzle. The fibres that we now print are more integrated into the filament. One can see that the fibres are laid out very straight within the print, which increases their strength. This is most-likely because the pressure in the nozzle is higher now.
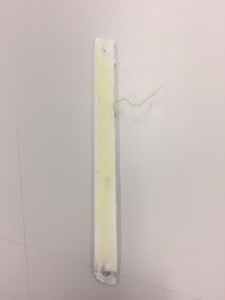
THe fibers that are printed are parallel to each other which makes the print much stronger.


