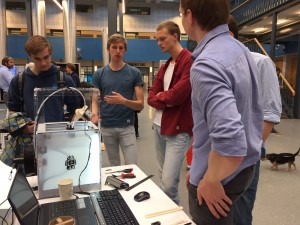
The goal of the project was to reinforce FDM with fibers. The Markforged printer can do this, however it is very expensive for hobbyists and small companies. This project focuses on modifying an Ultimaker 2 so that it can print fibers. This technique is way more accessible.
Finding the perfect winding ratio
The way we impregnate our filament with fibers is by winding the fibers around the filament just before it enters the nozzle. We do this because the length of the extruded filament is longer than the length of the filament that goes into the nozzle, thus more fiber must enter the nozzle per mm of filament. The winder is powered by a stepper motor and is connected to the PCB as a second extruder.
[vimeo]https://vimeo.com/188796988[/vimeo]
The winding ratio is configured using the M163 gcode command, which allows you to set a ratio between the two extruders (extruder and winder). First the steps per mm were defined (M92), by measuring the distance extruded by distance given. This means that if we tell the extruder to extrude 1 meter of filament that we measure the distance extruded and divide the current steps per mm by the ratio between the two distances.
The next step was changing the ratio (M163) in such a way that the winder makes two windings per mm of filament. This ratio is later used in an excel file to find the perfect winding ratio for each print.
In order to find the perfect winding ratio the ratio between the total travel path of the nozzle and the amount of filament extruded must be found. We wrote a python script that opens a gcode file, finds all the moves of the printer and adds the distance traveled together. It also finds the total amount of extruded filament (the E value in a G1/print command). The ratio between these values is the ratio between the length of fiber required and the length of filament inserted. This way you can calculate the perfect winding to extrusion ratio for each gcode. One flaw with this technique is that there is a small ratio between the calculated amount of extruded filament and the measured amount of extruded filament (this is probably due to a mistake in the steps per unit, or a printer inaccuracy) therefore we added an additional ratio to compensate for this. This will eventually give you the right values for M163 (the ratio between the extruders) and M221, which determines the speed of the flow (M221 is important because the ratio for the winder is larger than one, but the M163 command does not understand values larger than one).
Preventing clogging of the nozzle
A major problem with fiber printing is forcing a thick fiber and filament through a small nozzle. If the nozzle is too small, it will get clogged, but if the nozzle is too big there is not enough pressure to push the winded fiber into the filament for better fiber-filament adhesion.
During the project we used many different fibers and varying thicknesses. We found that thinner fibers were easier to print, but of course a thinner fiber means less strength. We also tested the difference between glass, carbon and aramid fibers. Glass fibers were too fragile to be bent around a small filament and would often break. Carbon and aramid fibers were more flexible and worked well. Our final product contained only aramid fibers because we did not have thin strains of carbon fibers, which were necessary to prevent clogging the nozzle.
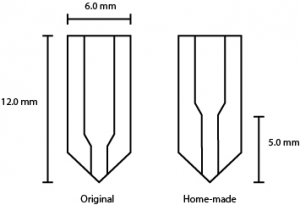
Because we used an Olsson block we could easily design and change our own nozzles. We wanted the nozzle to be big but still apply enough pressure on the filament. Therefore we made a nozzle with a longer thin part at the tip to increase pressure. We tested different tip lengths and different nozzle diameters and eventually used a nozzle with a diameter of 1.2 mm and a 5.0 mm long narrow tip.

Making printable objects
When using a normal slicer to slice your 3D objects the printer will almost always include some travel moves (G0). A travel move is a move that the printer makes without extruding any filament. This is a problem for fiber printing since the fiber is continuous. The first plan was to make a cutting device on the nozzle that would cut the fiber before any G0 commands. This unfortunately did not work and thus we decided to just change all G0 commands in to G1 commands (print commands).
Another problem we had while making our final chain links was that the slicer we used made each layer with half of the circles going clockwise and the other half going counter-clockwise. This results in a weak spot in the print where the direction is reversed. To solve this we made another program that finds all the circles that go counterclockwise and changes their direction to clockwise. This resulted in an increase in strength of 191% instead of 156% compared to prints with no fibers.


